Making a new desk (part 2): Buying a timber slab
In part 1 of this series I bought a desk frame, but I didn’t buy a tabletop to rest on it. That’s because I made my own out of a solid slab of Eucalyptus. What follows for the next few posts is not so much a how to, but an account of my journey making the tabletop. I’m an amateur and I was doing many things for the first time, so this includes many mistakes I made along the way.
Finding a slab
My brother recommended Go Natural Timbers, a business in Sydney which specialises in timber slabs and associated furniture, so I paid them a visit. There was a large warehouse full of slabs, in most cases stacked in their original positions in the tree. It doesn’t take that many large trees to fill a warehouse, so my choice was largely dictated by what was available – it wasn’t practical to choose a specific species and dimensions.
My research led me to believe there were a few objectively important characteristics to look for when choosing a slab:
- stable moisture content, relative to the intended climate
- lack of active rot, termites, or other wood eating creatures
There are cheap electronic meters that can measure moisture, but the appropriate moisture content varies depending on the climate. The aim is that the moisture content should be stable, since changes in moisture content cause the wood to swell or shrink, and therefore warp. I didn’t have one of these meters, and I didn’t know what an appropriate moisture content was for the Sydney’s climate. The staff told me that their slabs were kept outdoors for a long period of time before being sold, and that this ensured that they were dried appropriately.
It’s also important that there are no wood eating organisms living in a piece of furniture, because otherwise they would eat the furniture. My understanding is that there are two ways to ensure that this is the case. Either the wood is heated in a kiln to a temperature that kills the organisms, or it is treated with a chemical that kills them. The timber shop staff told me that their slabs are chemically treated.
So I took them at their word that the slabs on sale were dry and not decomposing. What remained was subjective choices. I wanted to build a desk that was reasonably deep (65-75cm) and 140cm wide, with a straight cut edge on the back and sides, and using the natural edge of the tree for the front edge. The depth requirement eliminated most of the slabs, which came from relatively narrow trees. The apartment I live in has a dark coloured carpet, so I wanted a light coloured wood to balance it. I also wanted wood with an interesting grain, with variations and imperfections. In my mind the purpose of using a slab rather than planks is to display the wood as it grows, and to embrace its natural form.
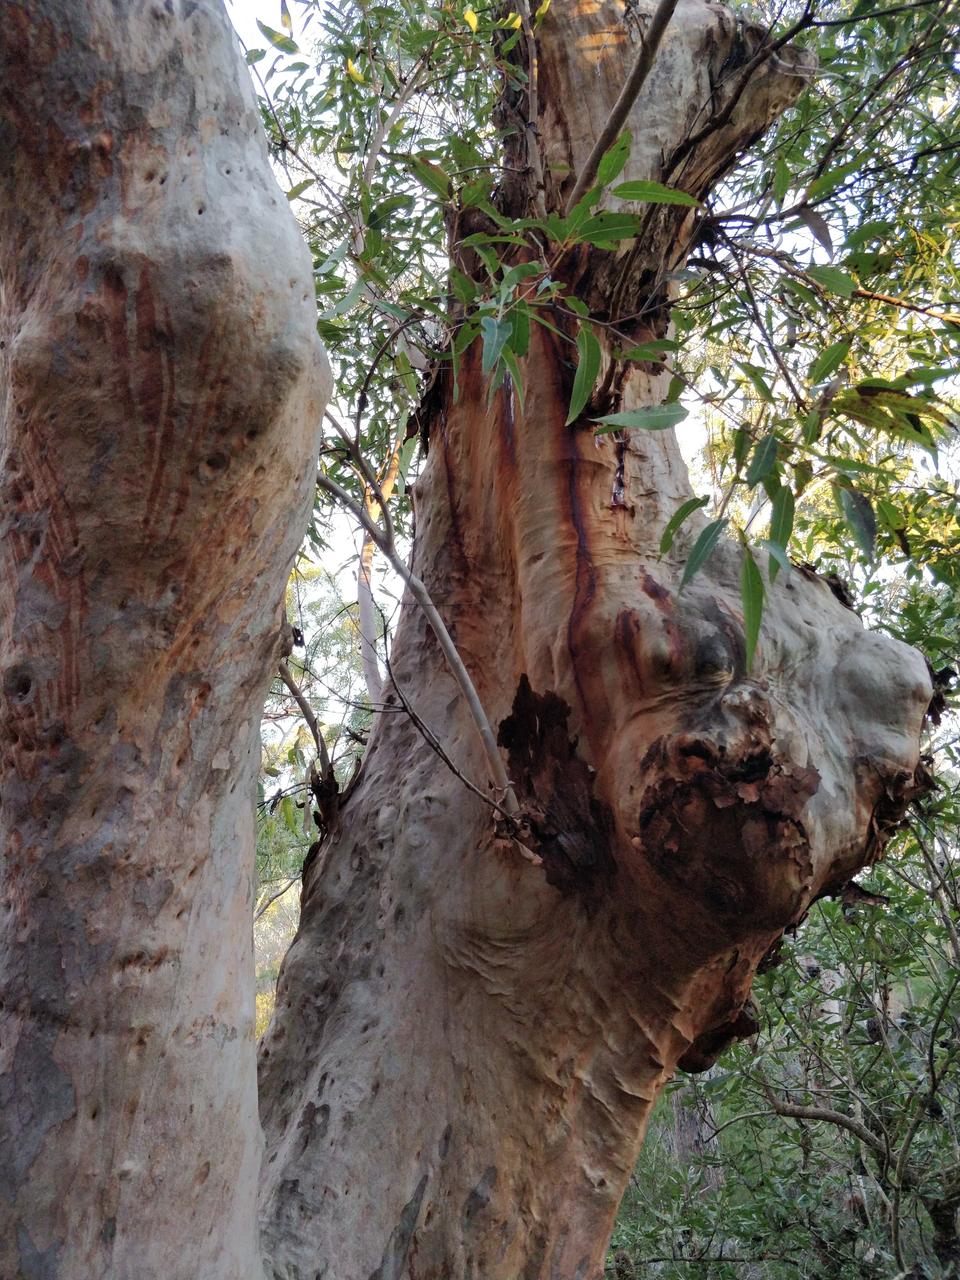
I returned a week later and had a look at a few slabs. They are kept in stacks, with gaps in between for ventilation. The grain is not easily visible because the wood is rough, unfinished, and has been exposed for a long time. To help see the grain and colour, the staff sanded patches of a few slabs that I was interested in, and sprayed some oil on them to make the grain visible. Given what was available, the choice was between Camphor (of which there seemed to be an infinite supply), or a light coloured Eucalypt they referred to as “true blue gum” (the exact species was unknown). When I thought about it I realised I really wanted my desk to be made from a Eucalypt. Eucalypts are the dominant trees in most of Australia and especially around Sydney where I live. They are the trees that I see on bushwalks, that constantly amaze me with their infinitely varying shapes and colours, and their various impressive abilities like surviving bushfires and growing out of tiny cracks in cliff faces. They remind me of many of my favourite places.
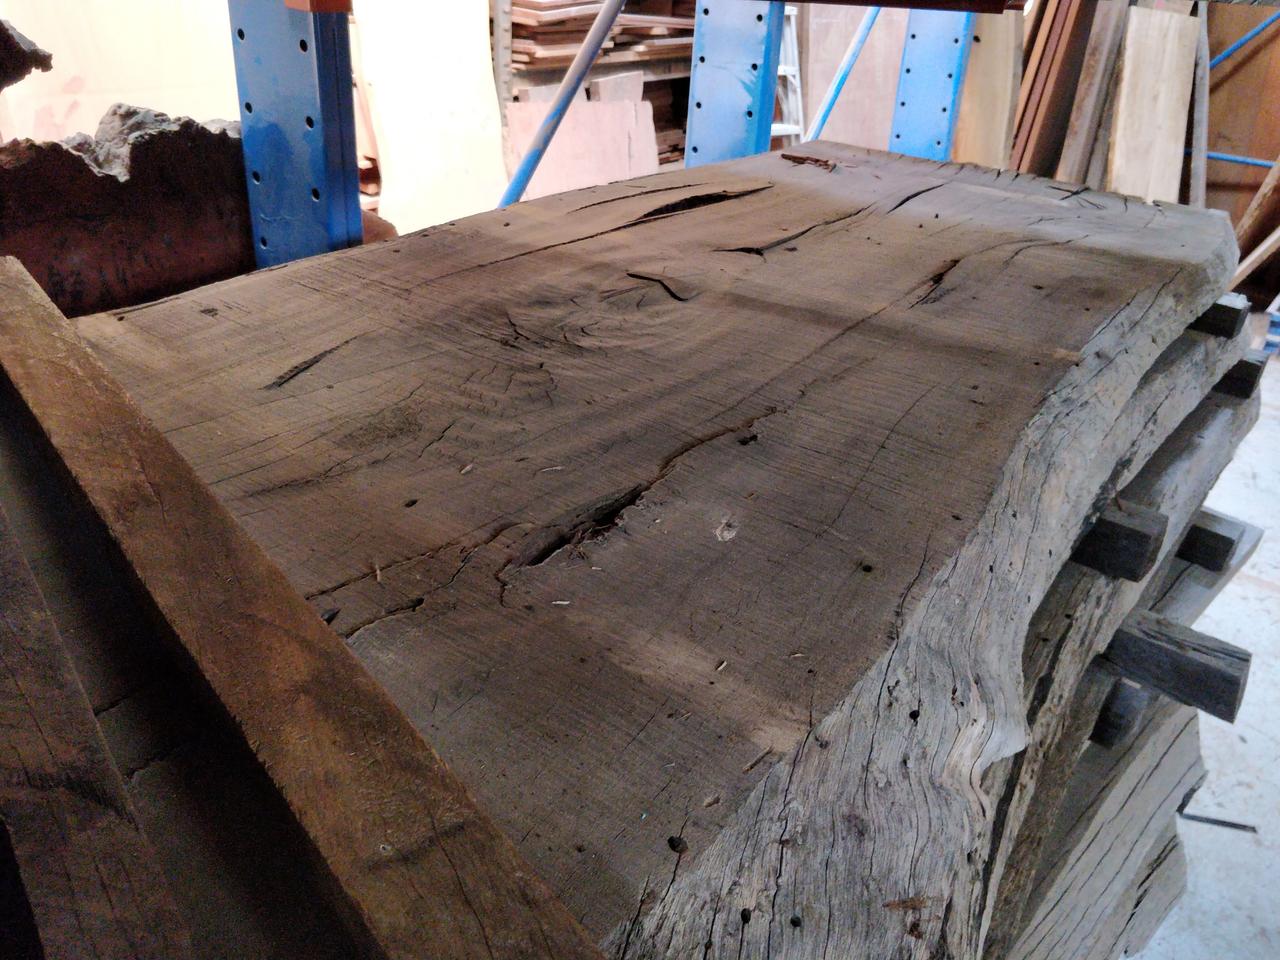
So I chose the “true blue gum”. It fit all my requirements, and it had a very irregular grain, and lots of knots and cracks. This would be terrible for anything structural, but great to look at. The tree must have been absolutely enormous. The photo shows only half of the log (the narrower half!), and the slabs underneath are closer to the middle of the trunk, and therefore wider. Even this piece led me to stray from my intended dimensions. The narrowest point was 75cm wide.
Wood species
I don’t know exactly what species the timber is, and it seemed like the staff at Go Natural Timbers didn’t either. There are apparently many species that are referred to as “true blue gum”. My brother is an arborist and suspects that it might be Eucalyptus Saligna, and it seems like Eucalyptus Globulus is also a possibility.
Outsourcing
I asked Go Natural Timbers about the cost of doing various parts of the process (since they also sell bespoke furniture), and their advice to me as an amateur. It turned out that cutting a slab to shape is trivially easy (with a table saw), and levelling (dressing) it is also a quick process (and therefore cheap). However filling in cracks and sanding are labour intensive and therefore expensive. At the same time, levelling is difficult without specialised tools which I didn’t have access to.
So I had the shop level the faces of the slab and cut it to shape, and decided to do the rest myself. Even though my apartment has no space for such a large desk I asked for it to be cut with the largest depth possible (75-85cm) because it seemed like a travesty to discard more of the wood. The price including dressing and cutting was $600.
Delivery
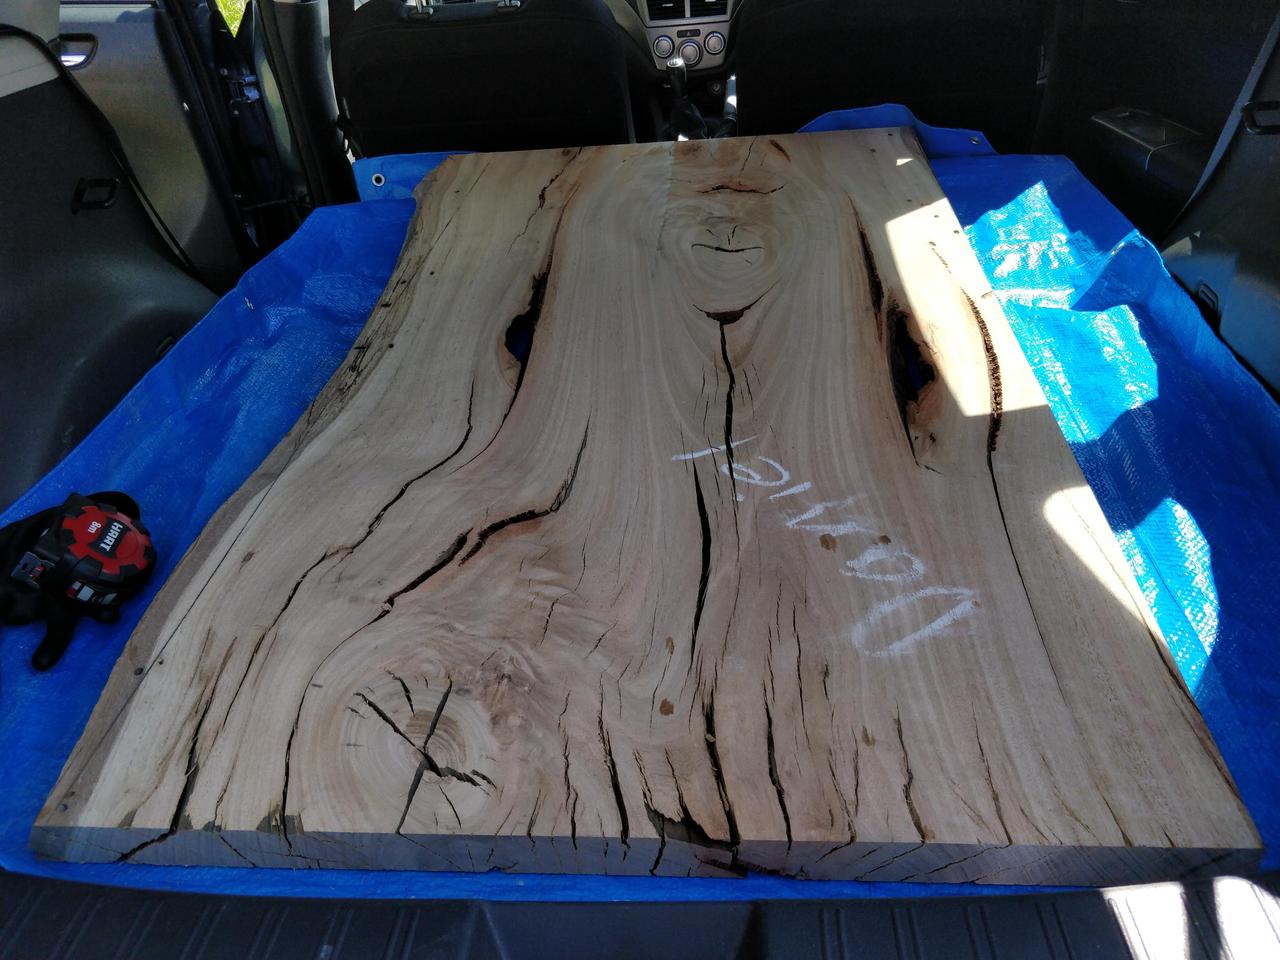
A week later I went to pick up my dressed slab. It had become significantly thinner, and some of the gaps turned out to be larger then they originally appeared. There was a small area of rot, but it seemed dry and still hard enough to be a desk. It also smelled really great.
And so I had successfully acquired a slab! In part 3 of this series I’ll write about the next steps – filling the gaps, sanding, and shaping the slab.