Making a new desk (part 5): Assembly and final reflections
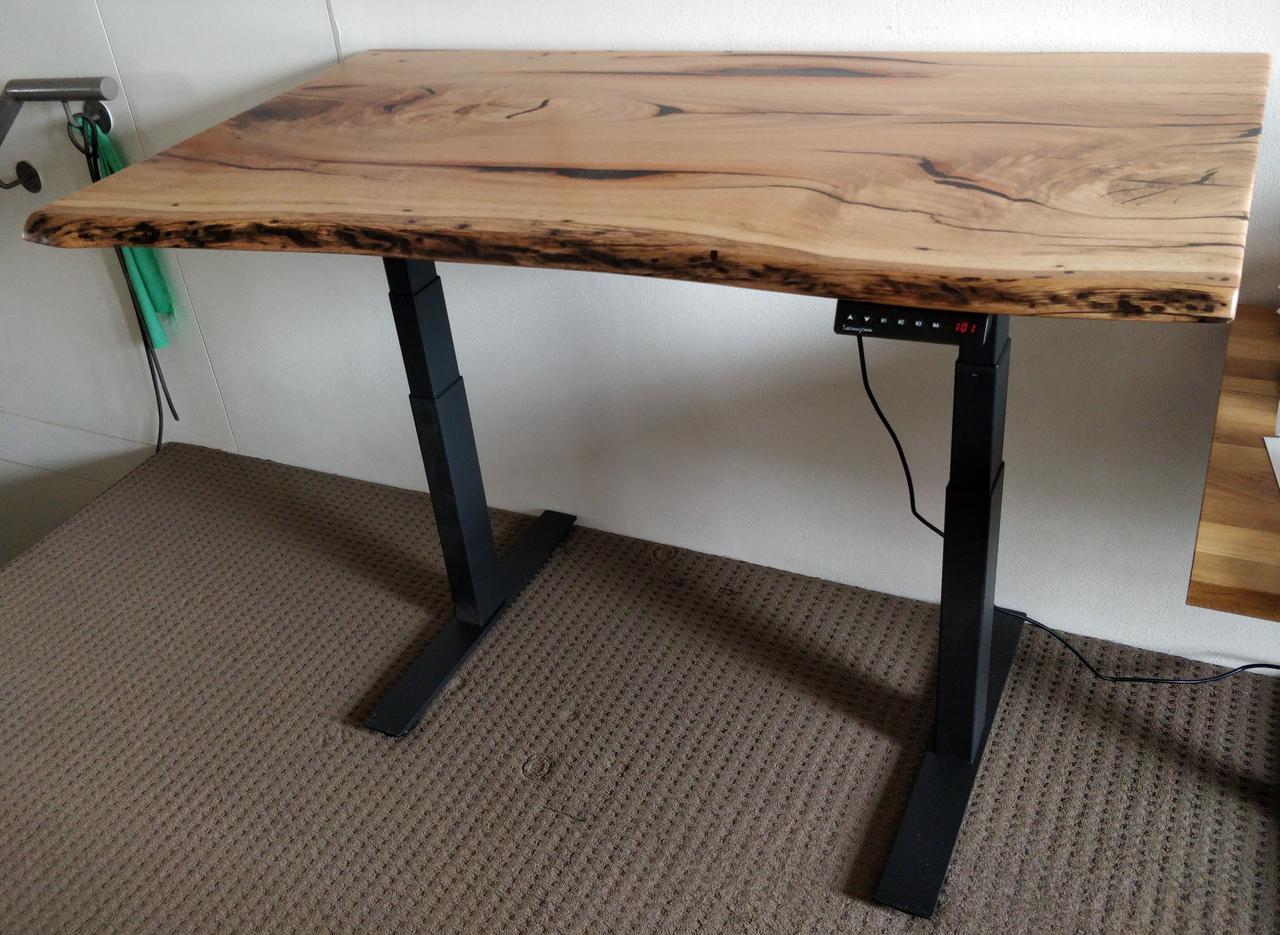
In part 4 I wrote about the process of choosing and applying a finish to my timber slab desk tabletop. There was now only a ceremonial amount of work left to attach the tabletop to the frame, and my desk would be complete.
Attaching the frame
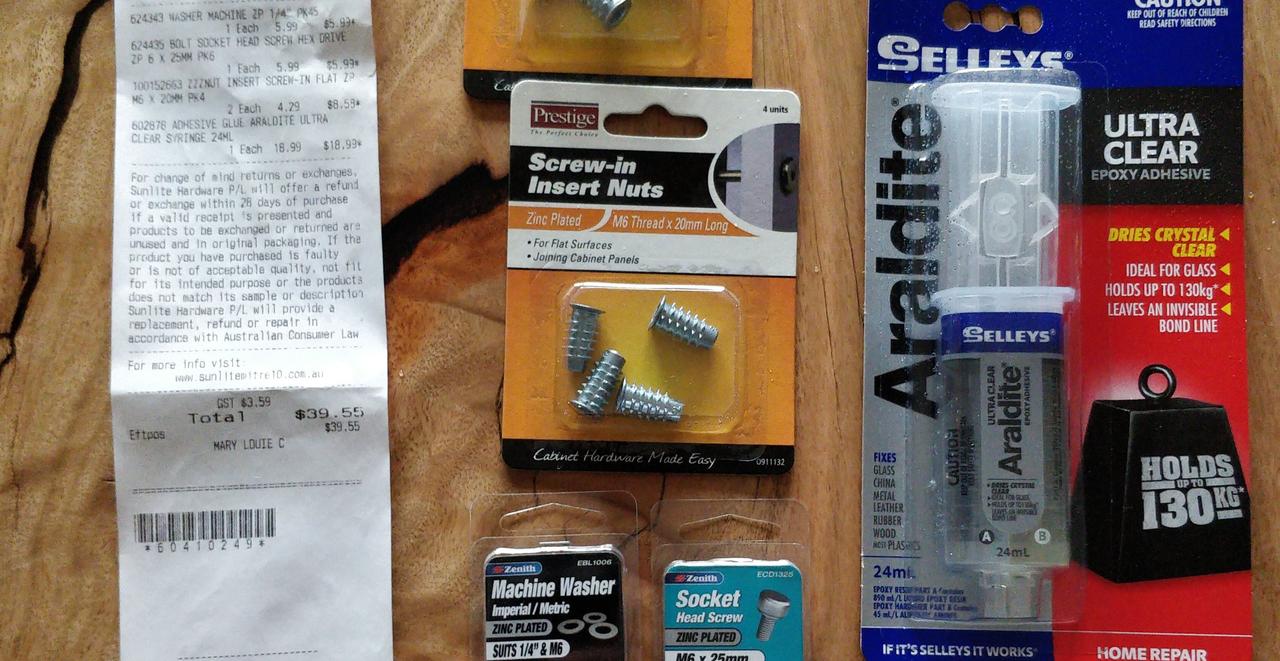
Rather than screwing the frame directly into the slab, I used socket head screws as an intermediate layer between the screws and the wood. I used fast 5 minute curing epoxy to glue the sockets into holes in the slab. This was more effort, but I didn’t want any risk of cracking the slab, and I figured this way would distribute the force more evenly on a larger area of wood.
Final reflections
Wow, this was a long journey! The whole project took a lot longer and was much more expensive than I expected (or cared to admit) before I started. Truthfully, I knew it would be a challenge and would take a long time – I had no detailed plan when I started, so I knew I would only know at the end what it would take. Buying a massive chunk of wood was a kind of forcing function – a way of committing myself to the project.
Cost
An incomplete set of approximate costs (AUD):
- Desk frame: $700
- Timber slab (cut and dressed): $600
- Melamine for the mould: $39
- Epoxy: $150
- Sanding disks and foam backing pads: $150
- Finishing products: $260
- Spray gun, masks, and goggles: $150
- Fastenings for assembly: $40
- Access to many tools and materials that I already had or borrowed, about 100 hours of my time, and 20 hours of Bruno’s time: priceless
That’s a total of about $2089. If I remember correctly, Go Natural Timbers suggested a ballpark figure of $2500 for the cost of producing the tabletop themselves. This number was slightly shocking to me when I heard it, but having done this project I have a new appreciation for the costs that would be involved. A professional workshop can no doubt have many of the materials much cheaper. For example, I bought packs of 10 sanding disks of each grit only to use 1-2, and a 4 litre pack of epoxy to use only 2 litres. They would buy everything in large quantities and only use as much as necessary for each job. But on the other hand they have to pay for the labour, maintain a workshop, etc, and turn a profit. Overall I probably saved a small proportion of the cost by doing most of the work myself, but I definitely wouldn’t embark on this kind of project to save money!
Experience
There were a lot of challenges but I loved every bit. I learned how to use a number of new tools, including a belt sander, random orbital sander (I now also know what that is), spray gun, and blowtorch. I learned about the different types of epoxy and how to use them, and about the different types of wood finishes. I only wish that I had a degree in chemistry so I could understand the ingredients in epoxy and finishing products.
Result
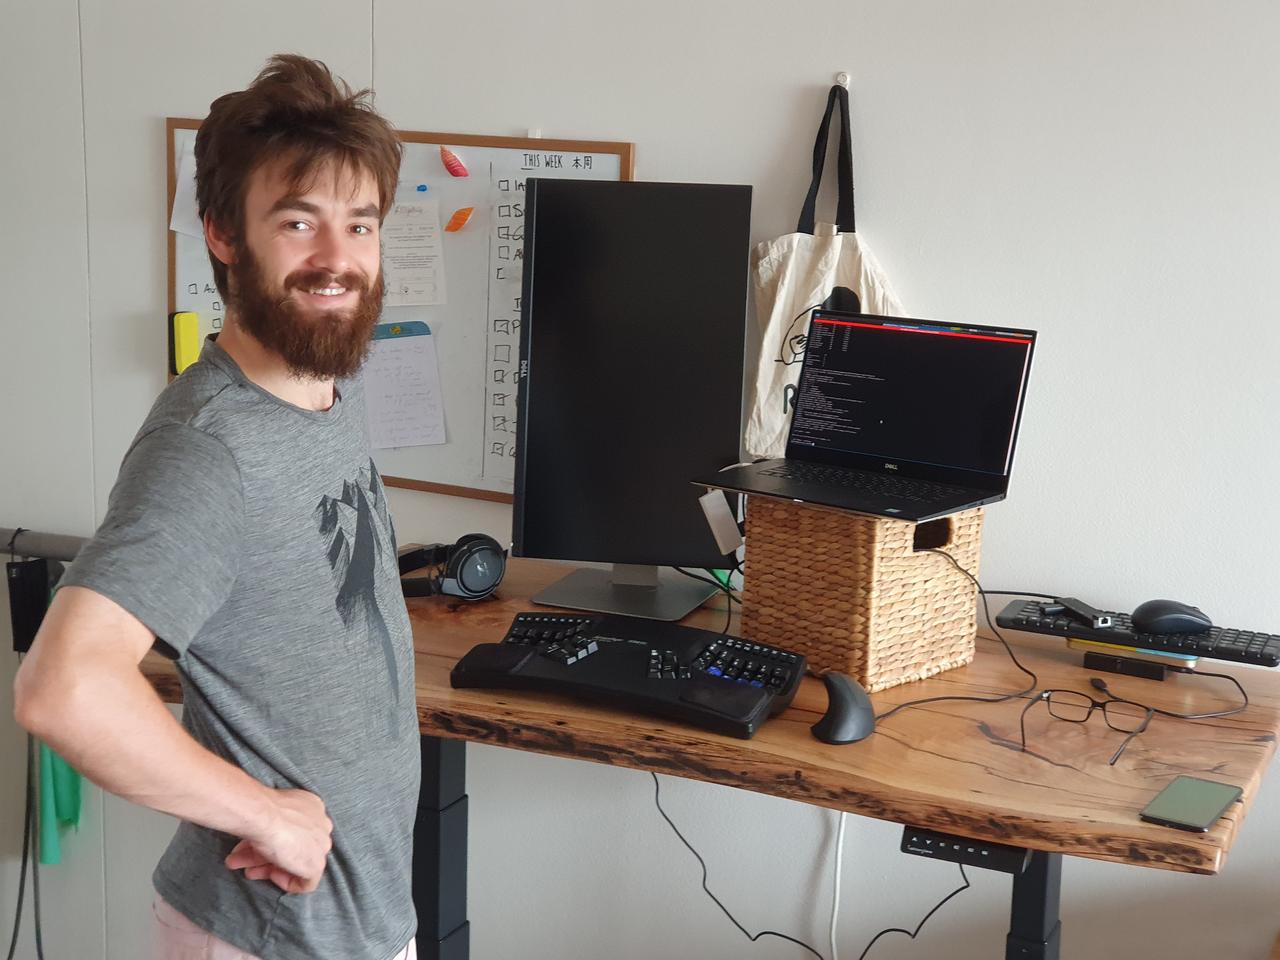
In my opinion, my new desk is awesome, and it serves its purpose wonderfully. I feel much more comfortable using it than my old desk thanks to the adjustable height and the ability to stand, and the quality of the surface is as good as I could have hoped.
Besides its utility, It looks beautiful. This is mostly just down to it being made from a huge piece of wood – but I’m happy that I didn’t fuck it up too much. Whenever I am bored, or waiting for code to compile, I gaze at the grain and try to imagine the tree and how it grew that way.
Despite that it has many imperfections. There are filled cracks where the epoxy is permanently soft, delaminations between layers of epoxy, cracks that were not filled, epoxy shrinkage, bubbles, a splotchy surface on the edges, a minor warp, and probably more issues that I’ve forgotten or haven’t noticed. But none of these things ruin it. They remind me that I made it myself.